Pages

Wednesday, August 28, 2013

RECIPE: HONEY OAT BREAD

that's really all it takes!
Every once in a while, I will inventory my pantry looking for items that need to be used up and exercise my Google-fu to come up with creative ways to do so. Some times this is disastrous but I find comfort in knowing it was food I was about to throw out any way but once in a while, when the stars are aligned just so, it all comes together and I end up with a blog-worthy recipe.

The discovery of a bag of rolled oats left over from a cookie exchange (where we explored the urban legend of the Neiman Marcus Cookie), the recent procurement of a bread machine and a co-worker’s challenge to find a healthy white bread recipe all collided in a deliciously fluffy loaf of healthy honey and oat bread.

this seriously happened while
I did my nails!
Bread making is notoriously difficult and finicky which is why I think the bread machine is the greatest invention since…well, sliced bread! The hardest part of bread making once you have one of these nifty machines is understanding the different types of yeast and how to handle to the particular type you are using.

THE MYSTERY THAT IS YEAST


When provided food (sugar, most commonly), moisture and warmth, yeast releases carbon dioxide which is what causes the tiny pockets of air that make bread so gloriously light and airy. The three most common types used for baking are: rapid rise yeast, instant active dry yeast and active dry yeast.

THE ODD MAN OUT


Rapid rise yeast has enzymes and other additives that make dough rise faster so your dough will only require one rise. You can shape your loaves right after kneading. No fuss. No muss. Unfortunately, like all such sorcery, this magic is not without its price. What you save in time you actually lose in flavor and texture. Because this type of yeast acts so differently, it is not interchangeable with the two active dry types.

INSTANT OR NOT, THAT IS THE QUESTION


The two types of active dry yeast are compressed and dried until the moisture content is only about 8% leaving your yeast dormant. The yeast only becomes active when it is mixed with a warm liquid.

Both types will give your dough two rises giving it ample time to develop that rich homemade flavor. Instant active dry yeast (also known as bread machine yeast)  is milled into finer particles than the regular active dry so it does not require any additional steps to activate. It can simply be added with your dry ingredients and away you go.

proof to be sure yeast is active
Instant active dry yeast seems to be the clear choice when using a bread machine but I've found that I actually prefer using the plain active dry yeast for a few different reasons. The main difference is whether or not proofing (a fancy term used to describe dumping your yeast into water with some sugar and watching it foam up) is required. 

Active dry yeast lasts about twice as long as the instant stuff and is generally less expensive. Also, the proofing of the yeast puts my mind at ease because you can actually see that the yeast is still active before adding all your dry ingredients and proceeding to waste the next three hours of your life. 

THE IDEAL YEASTY CLIMATE


Food (sugar) and moisture (water) are the easy parts. The trickiest part to bread making in a machine is getting the temperature of your proofing water right.
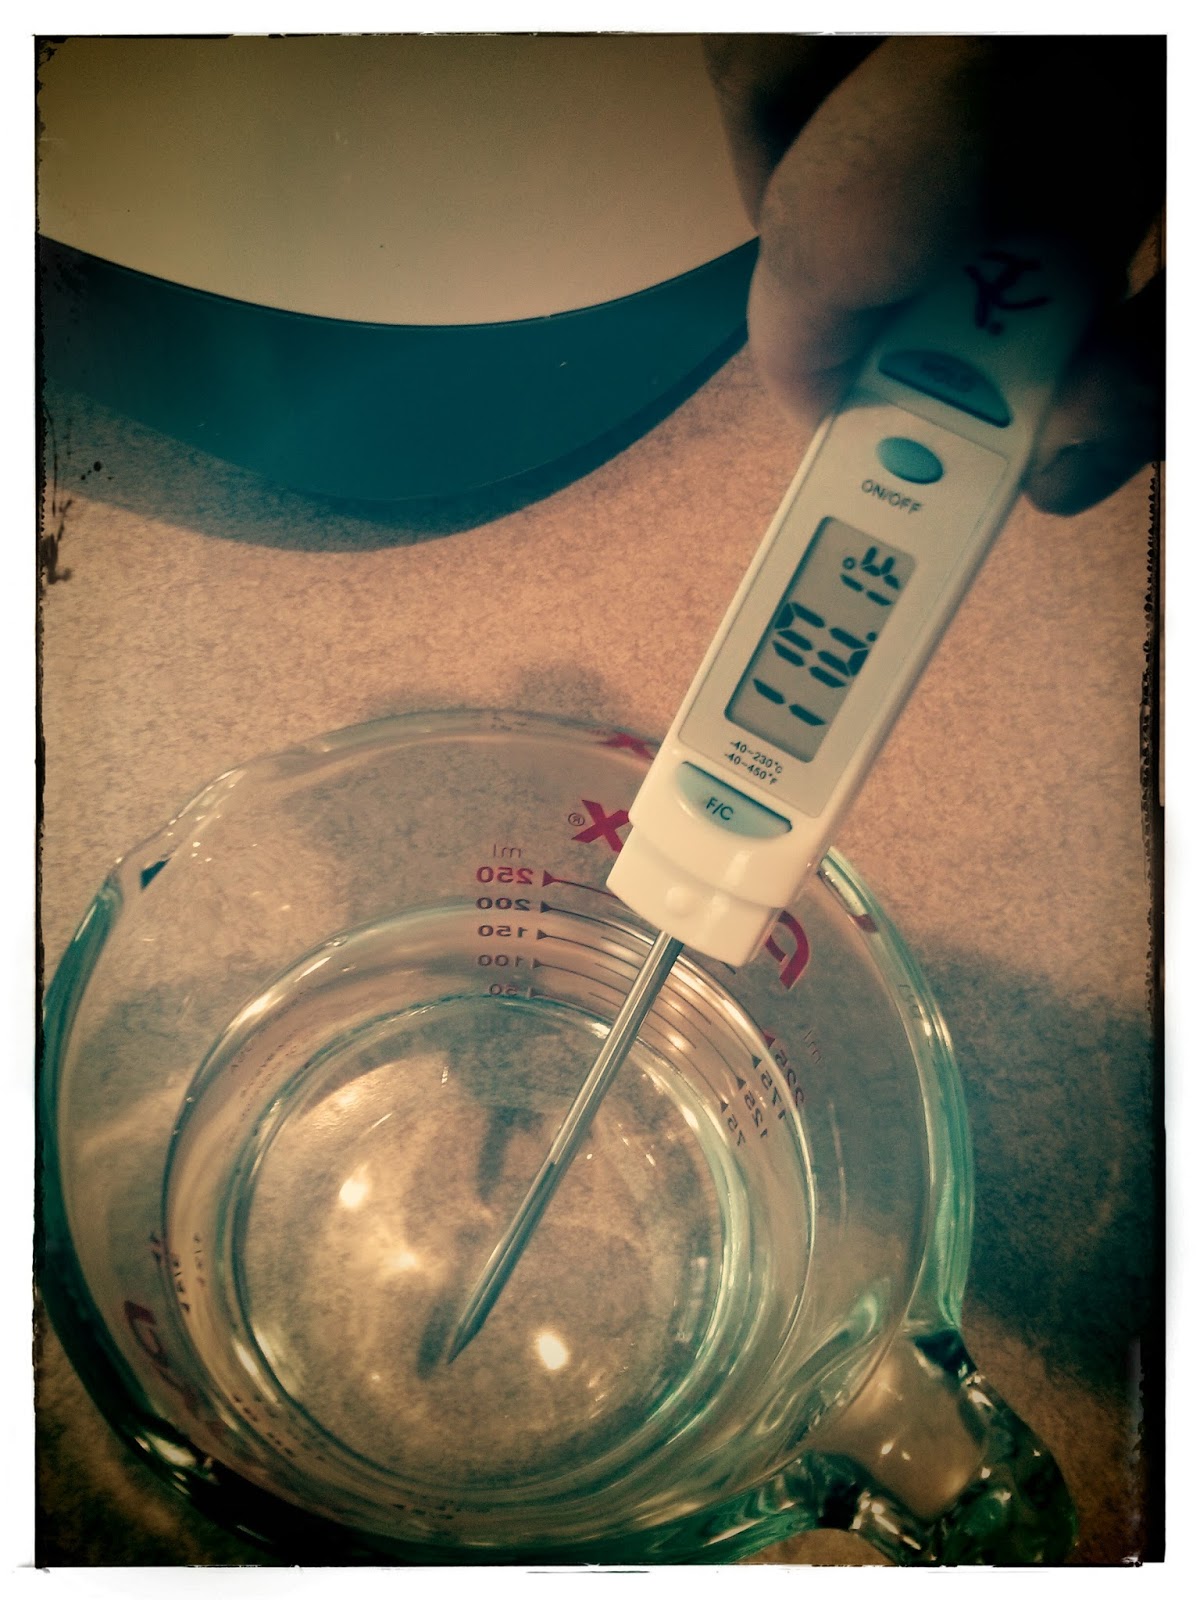
just right...
At 100° F or lower, an amino acid called glutathione is excreted which makes your dough impossible to handle

105° F–115° F is ideal for dry yeast to be reconstituted with water and sugar (proofing active dry yeast).

120° F–130° F is perfect for activating yeast designed to be mixed with dry ingredients (instant active dry yeast)

At 130° F–140° F, you've killed your yeast. It’s dead. Do not pass Go.

There’s a real science to bread making. Thankfully, the internet is full of smarty pants who have figured out all the science for those of us that just want to get down to the baking!

INGREDIENTS

recipe yields 1 one pound loaf
  • 1 cup water (110° F)
  • 1 packet (8 grams) active dry yeast 
  • 1 tablespoon brown sugar (if using active dry yeast)
  • 1 tablespoon of walnut oil (or vegetable oil)
  • 1/4 cup honey (less 1 tablespoon if using brown sugar to proof)
  • 1 teaspoon of salt
  • 1/2 cup rolled oats
  • 2 1/3 cups unbleached all purpose flour (or regular all purpose white or bread flour)

DIRECTIONS

  1. *Proof active dry yeast: add water (110° F), 1 tablespoon brown sugar and 1 package active dry yeast to machine
  2. Leave yeast to dissolve for approximately 10 minutes till it is foamy
  3. Add 1 tablespoon of walnut oil, 1/4 cup (less 1 tablespoon) honey and 1 teaspoon salt
  4. Then add 1/2 cup rolled oats and 2 1/3 cups unbleached all purpose flour
  5. Select crust colour, loaf size and press start

Delicious success! Perfect plain, toasted and for sandwiches!
*if you are using instant active dry yeast, add all liquid ingredients first, then the dry ingredients. Then make an indentation at the top of the mound to add your yeast.You can skip the brown sugar and use a full 1/4 cup of honey.

~the smallest loaf size selection on my machine was 2.5 lbs, so I selected the lightest crust setting and it baked up perfectly!


Tuesday, July 23, 2013

RECIPE: BACON WRAPPED COCKTAIL WIENERS

The summer weekends fill up so quickly. If it's not this BBQ, it's that Shower and all with a healthy smattering of general beach side procrastination between. There are times when my kitchen is my sanctuary - the summer is not one of those times!

The summer often turns into a pot-luck marathon for me so it's important to have a few quick and easy crowd-pleasers in my back pocket.

Here's one of my favorite go-to recipes. My sister-in-law call these Heart-Attack-On-A-Stick. There's just something about the bacon fat and brown sugar that keep them coming back for more!

What's a summer BBQ without something wrapped in bacon? Lacking!

INGREDIENTS

  • 1 pack of cocktail weiners (approx 40-50)
  • 1 pound of bacon (cut into thirds)
  • 2 - 3 tablespoons brown sugar

DIRECTIONS

  1. Preheat oven to 350 degrees F
  2. Wrap each piece of bacon around a cocktail wiener securing with toothpick, place on baking sheet
  3. Sprinkle brown sugar generously over bacon 
  4. Bake for 40 - 60 minutes till the bacon is desired crispiness
You can keep the wieners in a slow cooker on the Warm or Low setting to keep your appy warm for the duration of the party, but they really won't last long enough to go cold! 

Enjoy! Happy pot-lucking!


Tuesday, June 18, 2013

RECIPE: BLUE VELVET CUPCAKES


bright blue batter
darkens down when baked
I lack the ability to keep anything simple.

I recently volunteered to make cupcakes for a baby shower. Our co-worker is expecting a boy so the general consensus was for blue icing.

Being me, I decided to take the opportunity to experiment and tweaked my red velvet cake recipe to make blue cupcakes instead.

There's a misconception that red velvet cake is simply a white cake with red food colouring.

The main ingredients in a red velvet cake are dutch processed cocoa powder, vinegar and buttermilk.

cocoa powder
natural vs. dutch processed
Traditional red velvet cake is reddish brown; not the vibrant red that we all know it by now. Dutch processed cocoa powder is treated with an alkalizing agent which gives it just a hint of red colouring and a smoother, milder flavour compared to natural cocoa powder.

The alkali renders the powder neutral so, unlike natural cocoa powder, dutch processed powder will not activate the leavening agent (the thing that makes the cake rise) in the baking soda which is where the vinegar comes into play.

The very last step in any velvet cake is mixing the baking soda with vinegar and then folding this foaming mixture into the batter. It is important to use fresh baking soda (no more than 30 days old) in this step or you run the risk of falling cake syndrome.

And finally, buttermilk is what gives velvet cake its legendary moist and fine crumb.

making 2 types of cupcakes? extra batter? make an extra cake! 
Most recipes I've seen use food colour which is liquid based. I prefer using icing colouring which is gel based (to avoid making your icing too runny for decorating) for a more vibrant colour. Icing colouring is much more potent than regular food colouring; a little bit goes a long way! To make up for the liquid deficit, I like substituting some sour cream for an incredibly creamy and moist finished product.

I am happy to report: the cupcakes were a smashing success!

What's your go-to for deliciously moist cupcakes?

Yields: A 3 tier 8 inch cake or 24 cupcakes

INGREDIENTS

CAKE
Blue velvet cupcakes with white icing
& white mini's with blue icing

  • 2 cups sugar 
  • 1 cup butter, softened
  • 3 eggs 
  • 1 tablespoon dutch processed cocoa powder 
  • 1 tablespoon blue icing colouring 
  • 1 tablespoon sour cream
  • 2 1/2 cups cake flour, sifted 
  • 1 teaspoon salt 
  • 1 cup buttermilk 
  • 1 teaspoon vanilla extract 
  • 1/2 teaspoon baking soda 
  • 1 tablespoon vinegar

BUTTERCREAM ICING

  • 1 1/2 cups unsalted butter softened
  • 4 1/2 cups icing sugar
  • 3 tablespoons heavy cream
  • 1 1/2 teaspoon vanilla extract 

DIRECTIONS

CAKE

  1. Preheat oven to 350 degrees F
  2.  Grease and flour 3 (8-inch) round pans or use cupcake liners 
  3. In a mixing bowl, cream 1 cup butter and 2 cups sugar, mix until light and fluffy
  4. Add the eggs 1 at a time and mix well after each addition
  5. In a seperate bowl, mix 1 tablespoon cocoa powder, 1 tablespoon icing colouring and 1 tablespoon sour cream together to make a paste
  6. Then add the cocoa powder paste to the creamed sugar mixture; mix well
  7. Sift together 2 1/2 cups flour and 1 teaspoon salt
  8. Add flour mixture to the creamed mixture alternately with 1 cup buttermilk
  9. Blend in 1 teaspoon vanilla
  10. In the bowl used to make the cocoa powder paste, combine 1/2 teaspoon baking soda and 1 tablespoon vinegar to make a foam mixture
  11. Then fold the vinegar foam mixture into the batter
  12. Pour batter into pans. Bake 15 minutes for cupcakes (25 minutes for cake), or until a toothpick inserted into the center comes out clean.
  13. Remove from heat and cool completely before frosting.

BUTTERCREAM ICING

  1. Cream together 1 1/2 cups unsalted butter and 4 1/2 cups sugar
  2. Mix in 3 tablespoons heavy cream
  3. Mix in 1 1/2 teaspoon vanilla extract

Sunday, June 9, 2013

Homemade vs. Store-Bought


Michelle on Facebook makes a valid point on my previous post:
 …I don’t overly agree with all the processed items she’s suggested (ie. Chicken stock, soy sauce).
It seems that in this day and age, any food discussion, especially here on the West Coast, must also involve health conscious options.

I’m not known for my healthy dietary choices, if anything it’s quite the opposite. I am that girl who hosted the Great Fried Chicken Showdown of 2010 - otherwise known as the day D and I tried answering the age old question: KFC or Church’s?  

Churches won out on texture but we disagreed on taste though they both smelled like heaven 
My husband refers to fried chicken as the “dirty bird” (despite the very official empirical data I provided him on its awesomeness) and refuses to eat it, regardless of the charming mascot on the bucket. I won’t lie, there’s a small bit of resentment on my part, but come bikini season; I am reminded of the evils of fried food. 

I make mention in my last post that there was a time when “I could eat all sorts of glorious fast food with nary a second thought”, but what I failed to make clear was that this time has passed – LONG PASSED.

With an aging body and a slowing metabolism, what choice is there but to question my consumption of the dirty bird? 
Oh, but it sounds like such a glorious idea!
 It’s one thing when you answer to only yourself, but as you become increasingly responsible for the healthy habits of others you are forced to consider the options.

how can you say no to that face?
Even D has now adopted a whole new philosophy on food, opting for the less carnivorous and more organic options to feed her bundle of baby joy. Her husband protests that he married an Eastern European meat-eater; this bait and switch is just cruel! 

On the one hand, I feel as though I've lost my best friend. But, on the other hand, if you go through the trouble of making a little person, you want them to eat healthy so they can grow up big and strong to reach things on the top shelf for you (or the second shelf too if you're me).

Much like matter and anti-matter, I feel that a choice must be made between health, budget, convenience and taste; and never the twain shall meet. 

Healthier choices are often more expensive and less convenient. More convenience usually translates into less healthy. Feeding a family with healthy options on a balanced budget without having to quit your day job is a balancing act!

When given the choice, homemade chicken broth is the bee’s knees (I have no idea what that means, but I hear it’s awesome).  In a pinch though, the store bought stuff is your Hail Mary!

chicken so good, it strikes a pose
Whenever we roast a whole chicken (or bone-in pieces), I freeze the carcass. When I have a pile of otherwise unusable chicken bits saved up, I turn them into a double batch of chicken broth which gets packaged into convenient portions and put back into the freezer for future use. 

But the sad reality is; man cannot live on chicken alone (first world problems)! We just don’t eat enough chicken to keep my freezer supply flush.

What’s a girl to do? 

We choose; and choose wisely, we must! Not all store-bought products are created equal and with the money saved from freezer cooking and chicken scrapping, it’s not unreasonable to splurge on the more expensive, healthier and/or organic options (or a high quality pressure cooker to churn out a batch of broth in a fraction of the time).

Remember your Google-Fu? Use it! We’re not the first to ponder this dilemma!
homemade vs store bought?

I’m a strong believer in moderation. Almost everything we consume is homemade so the preservatives and other tongue twister ingredients are kept to a minimum. The odd bit will inevitably slip in - c'est le vie...sometimes you can have your dirty bird and eat it too!

I may change my tune when we add a small child to the mix but, for now, I am confident that I am feeding my family a healthier diet than average.

Our monthly budget is tracked meticulously and the ingredients that go into our freezer meals are constantly reviewed for cost-efficiency. For now, I am still a full-fat kind of gal, and saving money often wins out over healthier alternatives. Little by little, though, I make healthier adjustments. 

That’s the beauty in freezer cooking; you are the master of the universe in your own kitchen (sans Battle Cat, of course).

My fried chicken showdown days are mostly behind me now, but I'm still quite adept at finding ways to indulge.

What are your guilty pleasures? 

Tuesday, May 21, 2013

KITCHEN EFFICIENT: MAKING THE MOST OUT WHAT YOU HAVE


The following was originally written as a guest spot for Transforming The Now. It felt fitting to mark my re-entry into the blogosphere right here...


FROM KITCHEN-NEWB TO KITCHEN-DON'T-SEEM-SO-NEWB


When Sunshine first asked me to write a guest post, I laughed – nay, I full on scoffed! 

Despite my recent efforts in the kitchen, Julia Child, I am not. Who could possibly be interested in anything I would have to say? But then I remembered; when I was first approached to teach dance classes, I scoffed then as well – nay, I full on snorted! I thought then, who could possibly be interested in anything I would have to say? 

Surprisingly, it turned out to be a number of people. As I gained confidence in front of the dance class I realized that having been a novice so recently, I had unique insight into what it was that helped me progress so quickly from toe-trampler to dance teacher. I had not become so good that the steps were second nature. I still had to think about what I was doing and was able to articulate the thought process behind each of the steps that I taught.
When KD met Lychee
I’ve never been known as a homebody, I had a difficult time envisioning myself as a wife or a mother. Most of my bachelorette nights were spent grabbing convenient nourishment between dance classes, and on some nights a box of crackers and a can of lychee were my best friends. Being young and active, I could afford to eat all sorts of glorious fast food with nary a second thought. I was incredibly free and answered to only myself.
our "modest" condiment collection
As the story often goes, my life took a very a sudden and unexpected turn a few years ago when I met the proverbial geeky boy. Several months later, we were moving in together and combining the contents of our refrigerators – which really only amounted to a modest collection of condiments.  In my pantry, I moved over two cans of mushroom soup, a box of instant cake mix, and a can of Spam (I had just eaten the lychee) to make room for his box of Kraft Dinner and half a bag of egg noodles. We had both been single for a very, very long time!LESSON: THE FIRST
During the first few months of cohabitation, dinners were mainly take-out, although once a week or so one of us would make the foray into our tiny condo-sized kitchen to make a mess. Each time I ventured into the kitchen I was armed with an elaborate recipe, hoping to wow my husband-to-be.
what the heck was I making?! 
Herein lies lesson number one: more elaborate recipes don’t make better meals.
Elaborate recipes can turn cooking into a chore, especially on weeknights when you’re already exhausted from nine-to-fiving then commuting to six and they usually require an unnecessarily long list of ingredients. My best advice to any newbie kitchen explorer: SIMPLIFY.                                            

Ingredient lists should be comprised of pantry items that are common to a number of recipes. It doesn’t make sense to buy ingredients you may only use once. Build an arsenal of simple recipes with basic ingredients and save the elaborate recipes for weekends when you have more time.

One of my favorite weeknight meals now is homemade Mac n’ Cheese: 
cook macaroni, shred cheese, add milk and bake
Simplicity can be delicious!

IDENTIFY THE FAT. FIRE AT WILL.

sexy shoes:
totally worth starving for
The early reincarnation of our budget allotted $700/month for groceries and about $200/month eating out. We were determined to start cooking at home more and we thought that this one minor adjustment to our lifestyles would pay our mortgage for us. This was not the case.  We quickly learned that eating $900/month didn’t allow us to squirrel any money away for lovely things like vacations or sexy new shoes (the latter unbeknownst to my husband of course).
We stopped eating out. We were shopping at Superstore instead of SaveOn. We even armed ourselves with a shiny Costco card. Still, we were barely making a dent in our grocery bills.  Even though we were eating at home more often, we were still over spending. Our kitchen habits were horribly inefficient. We were wasting a great deal of food and essentially throwing out our hard earned cash dollars every Thursday. Buying bulk cheese on sale is a wondrous thing. Throwing out ¾ of a block of moldy cheese-like substance is grounds for termination.

THE CHAIN MEAL

I soon realized that you can’t approach each meal individually. A meal plan that addresses only “what are we having tonight?” is wasteful of time, effort and resources. Even whilst diligently stopping at the grocery store every night after work, we were still on track to becoming those parents who live out their retirement in their first-born’s basement.
DINNER -> LUNCH -> DINNER ->...
A meal plan needs to encompass more than just one meal. Tonight’s dinner should be prepared with tomorrow’s meals in mind. Any ingredients you don’t use up tonight should be incorporated into tomorrow night’s dinner – instead of being forgotten in your fridge or pantry till small colonies are amassing.
size DOES matter!
Feeding a family of even just two requires a contentious thought process. Grocery shopping only once every other week and buying in bulk is a good starting point. It forces you to plan your meals and to get creative with how you manage your inventory.  
Let’s say you have a recipe that calls for chicken stock. Why buy a can when you can buy a carton for less per ml? On that note, why buy a single carton when you can buy a case for less per carton?
What does one do with all that chicken stock? Make rice! Having leftover chicken stock from Sunday dictates that our Monday meal will be served with rice. Instead of using water to cook the rice, I substitute chicken stock, adding half a tablespoon of olive oil and one tablespoon of light soya sauce. If I’m feeling fancy, I’ll throw in some golden raisins and almond slivers for a Mediterranean flare. I always make at least two cups of rice (which turns into four cups cooked) leaving us enough to pack our Tuesday lunches and make fried rice for dinner. I can’t stress enough how useful an ability to make fried rice is. It is such a versatile dish that works with almost any left overs. You can put anything it!
Here we’ve essentially strung three meals together (four if you count lunch). The longer the chain, the better!   

Planning dinner shouldn’t only be about what you want to eat, but rather, what can you make out of what you have that is equally delicious?

USE YOUR GOOGLE-FU

I have a butter and chive salmon recipe that is prepped and served in under 20 minutes. This makes it a household favorite.  The grocery stores in my area only sell chives in prepackaged amounts and I always have a ton left over. So I dug deep, reaching for my inner Google kung-fu, and scoured the web for new, simple recipes involving chives.
I found a cheddar and chive buttermilk biscuit recipe with great reviews so I went out to pick up the missing ingredients. The store only sold buttermilk in one litre cartons and the recipe only called for a cup but one of the reviewers mentioned that the biscuits freeze nicely so I doubled the recipe. I froze all the leftover biscuits on a cookie tray individually overnight, then packaged them into two-person portions to be pulled out and thawed whenever our meal lacked a carb.
I repeated this process with the remaining half litre of buttermilk on regular plain biscuits and froze them unbaked. Whenever we want biscuits now, we just pop three or four directly into the oven for 20 minutes and fresh baked goodness is ours for the taking! We’re never stuck eating stale carbs for a week.

AN OBSESSION WAS BORN: FREEZER COOKING

Armed with the holy trinity of the modern housewife (a Costco membership, a deep freeze and a vacuum sealer), I’ve learned that premaking meals in bulk is a great time saver and a great way to save money.
My marathon cooking sessions have lasted anywhere from three to nine hours. It takes time and planning but more importantly it lets me maximize that time I spend in the kitchen. My math-mojo isn’t so great that I can say how many kilojoules of energy I save with freezer cooking, but what’s for certain is that the inconvenience of cooking on the weeknights has been displaced to a time of my choosing.  

I’ve enlisted the help of my sister-in-law and our time spent cooking together has become precious bonding time that we may not have been afforded otherwise. We’re on track to having her freezer filled with at least 60 meals before August, when her second child is due to be born.
just another typical Sunday
Freezer cooking is something to be learned and practiced. No one is great at it from the get go, and had I known that, I may have started this sooner! Mistakes will be made, some food will be wasted, but it’s all part of the learning process.
Just recently, I changed the molecular structure of ham. The meat was inedible – sacrilege wasting such good pig! My sister-in-law’s husband, who has been married for many, many moons, spat out his first bite and fed the rest to the dog. My husband, being a newly-wed, dutifully choked his down and thanked me when I packed up the leftovers and made him take it for lunch.
I tweaked the recipe and tried again. Let’s just say I’ll be feeding the rest of this batch to my husband while I can still give him the newlywed eye-bat and get my way. Lesson learned: do not under ANY circumstances use fresh pineapple in freezer meals!
There’s a wealth of information on the internet about Once A Month Meal Plans. I haven’t quite taken it to this extreme yet. I’m still muddling my way through, constantly researching and trying new things. The problem with these websites is that they are blogged by what I can only assume are Supermoms who wear capes instead of aprons. The things they do are mind boggling! But they’ve become so good at their craft that sometimes a newbie like myself has a hard time following.  
what's for dinner? 
Be patient. Examine recipes. Read the comments!  
Start slow! One of the easiest methods to start off with is the double up program. When you make a meal – double it. It takes an extra 1.865 minutes to construct a second lasagna to be packaged up and frozen for another day (and yes, that number was completely made up). This method allows you to use tried and true recipes that you can confidently make with relative ease. Start with what you know.
I’m now proudly sporting a monthly budget of $450 for groceries. We almost never eat out anymore, and I can go weeks without grocery shopping, free to spend my extra time in the evenings pursuing the multitude of other interests I have. Each week, it only gets easier. What more can a girl ask for?
Anything she wants, with the money she’s saved!